This may help some people.
What doesn’t work, off a fresh install:
- Wifi (can be fixed with some non-free packages from Debian)
- 32bit software (this is a PureOS thing not because I run on a Mac, can also be fixed with some packages from Debian if desired).
I’m thinking of writing howto guides for the above as well… But I’ll need to reinstall and experiment more because at this point my PureOS install has become a Debian 10-PureOS 8 hybris…
YMMV may vary on features that work or don’t work, depending on the Mac model you are installing on.
But first, how to even get the installer started:
This is based on a few resources, mainly:
https://help.ubuntu.com/community/How%20to%20install%20Ubuntu%20on%20MacBook%20using%20USB%20Stick
in this tutorial, I will be using files in my Downloads folder, on the macOS side.
“~” represents your Home folder, e.g. my username is patrix so my ~ is equivalent to /Users/patrix
After step 1, any command is liable to irreperably delete all your personal data. Make sure you read and understand properly and are using the correct device names or you might cause damage. MAKE BACKUPS!
One important thing to understand is that device names and IDs might differn on your computer. Make sure you read the output of the commands on your own machine rather than blindly copying the examples I post.
Lines that start with # are comments, so they are safe to copy and paste, they won’t do anything
Commands starting with “sudo” are the really dangerous ones, proceed with caution
1. Prepare the Image
open /Application/Utilities/Terminal.app
type:
cd ~/Downloads
# Convert the iso to a format suitable for flashing to USB
hdiutil convert ./pureos-8.0-gnome-live_20190210-amd64.hybrid.iso -format UDRW -o ./pureos.img
output:
$ hdiutil convert ./pureos-8.0-gnome-live_20190210-amd64.hybrid.iso -format UDRW -o ./pureos.img
Reading Master Boot Record (MBR : 0)…
Reading PureOS 8.0 GNOME Live            (Apple_ISO : 1)…
Reading  (Windows_NTFS_Hidden : 2)…
..........................................................................................
Elapsed Time:  8.539s
Speed: 172.7Mbytes/sec
Savings: 0.0%
created: /Users/patrix/Downloads/pureos.img.dmg
2. Find USB the disk you wish to use
diskutil list
for example on my Mac I see:
$ diskutil list
/dev/disk0 (internal, physical):
   #:                       TYPE NAME                    SIZE       IDENTIFIER
   0:      GUID_partition_scheme                        *1.0 TB     disk0
   1:                        EFI EFI                     209.7 MB   disk0s1
   2:       Microsoft Basic Data SHARE                   199.5 GB   disk0s2
   3:           Linux Filesystem                         800.2 GB   disk0s3

/dev/disk1 (internal, physical):
   #:                       TYPE NAME                    SIZE       IDENTIFIER
   0:      GUID_partition_scheme                        *1.0 TB     disk1
   1:                        EFI EFI                     209.7 MB   disk1s1
   2:                 Apple_APFS Container disk2         1000.0 GB  disk1s2

/dev/disk2 (synthesized):
   #:                       TYPE NAME                    SIZE       IDENTIFIER
   0:      APFS Container Scheme -                      +1000.0 GB  disk2
                                 Physical Store disk1s2
   1:                APFS Volume Selentium               842.4 GB   disk2s1
   2:                APFS Volume Preboot                 48.0 MB    disk2s2
   3:                APFS Volume Recovery                519.8 MB   disk2s3
   4:                APFS Volume VM                      2.1 GB     disk2s4

/dev/disk3 (external, physical):
   #:                       TYPE NAME                    SIZE       IDENTIFIER
   0:     Apple_partition_scheme                        *1.0 TB     disk3
   1:        Apple_partition_map                         32.3 KB    disk3s1
   2:                  Apple_HFS Backups                 1.0 TB     disk3s3

/dev/disk4 (external, physical):
   #:                       TYPE NAME                    SIZE       IDENTIFIER
   0:     FDisk_partition_scheme                        *15.5 GB    disk4
   1:             Windows_FAT_32                         15.5 GB    disk4s1
And I know for a fact I just bough and connected a 16GB USB stick so I know the device I want to use is /dev/disk4
one point though, when using the device we want to use it “raw” (I can’t remember the macOS reason for this but let’s roll with it) so we will use /dev/rdisk4 instead of /dev/disk4
I repeat: make backups! And once you have a full time machine backup, eject and disconnect your backup disk, that way there’s lesser risk of losing all your data!
Additional points: I know I’ve partition my internal disks this way:
1TB HDD: 800GB partition for Linux, 200GB partition for sharing files between Linux and macOS. So that would be /dev/disk0 above
1TB SDD: My macOS disk, I definitely don’t want to be touching this. Since i’m on Mojave, it shows up as an APFS container, so that’s /dev/disk1
1TB USB HDD: my backup disk with Time Machine, that’s conveniently named “Backups”, that’s /dev/disk3 above.
Be careful to identify and choose the right device!
3. Flash the Image
Now we write the .img we created in Step1 to the disk we identified in step2:
# First, unmount the disk so that we can erase and write to it. /dev/disk4 is fine, rather than /dev/rdisk4
# it's important to unmount rather than eject
diskutil unmountDisk /dev/disk4
# Flash the image:
sudo dd if=./pureos-8.0-gnome-live_20190210-amd64.hybrid.iso of=/dev/rdisk4 bs=1m
quick explanation: dd means “copy and convert” but in the 80s, the command “cc” was already used for the “C compiler” so they used the next letters in the alphabet lol. It will copy byte for byte the img file to the disk sectors.
“if” means "input file.
“of” means “output file”, yes disks are represented as files in most Unix-like operating systems
“bs” means “block size”, now in many dd tutorials this will have a capital case M, but that’s for the GNU version of dd, we’re using BSD, so we need a lower case m. In either case, it means 1 megabyte sized blocks. dd will read 1MB of data, then write it. I’ve found it doesn’t really matter what size you specify, except experience tells me 1m provides best performance and less risk of errors.
output (there is no output until the process is finished, so be patient… could take a few minutes)
$     sudo dd if=./pureos-8.0-gnome-live_20190210-amd64.hybrid.iso of=/dev/rdisk4 bs=1m
1474+1 records in
1474+1 records out
1546567680 bytes transferred in 150.805705 secs (10255366 bytes/sec)
Your macOS will popup a warning saying it can’t read the disk, do not choose initialize, choose ignore! This is normal and expected, because the Mac cannot read the Linux filesystem.
4. Reboot
You can now reboot and keep the option key pressed, and you should see the external disk ready to boot. It should look something like this picture.
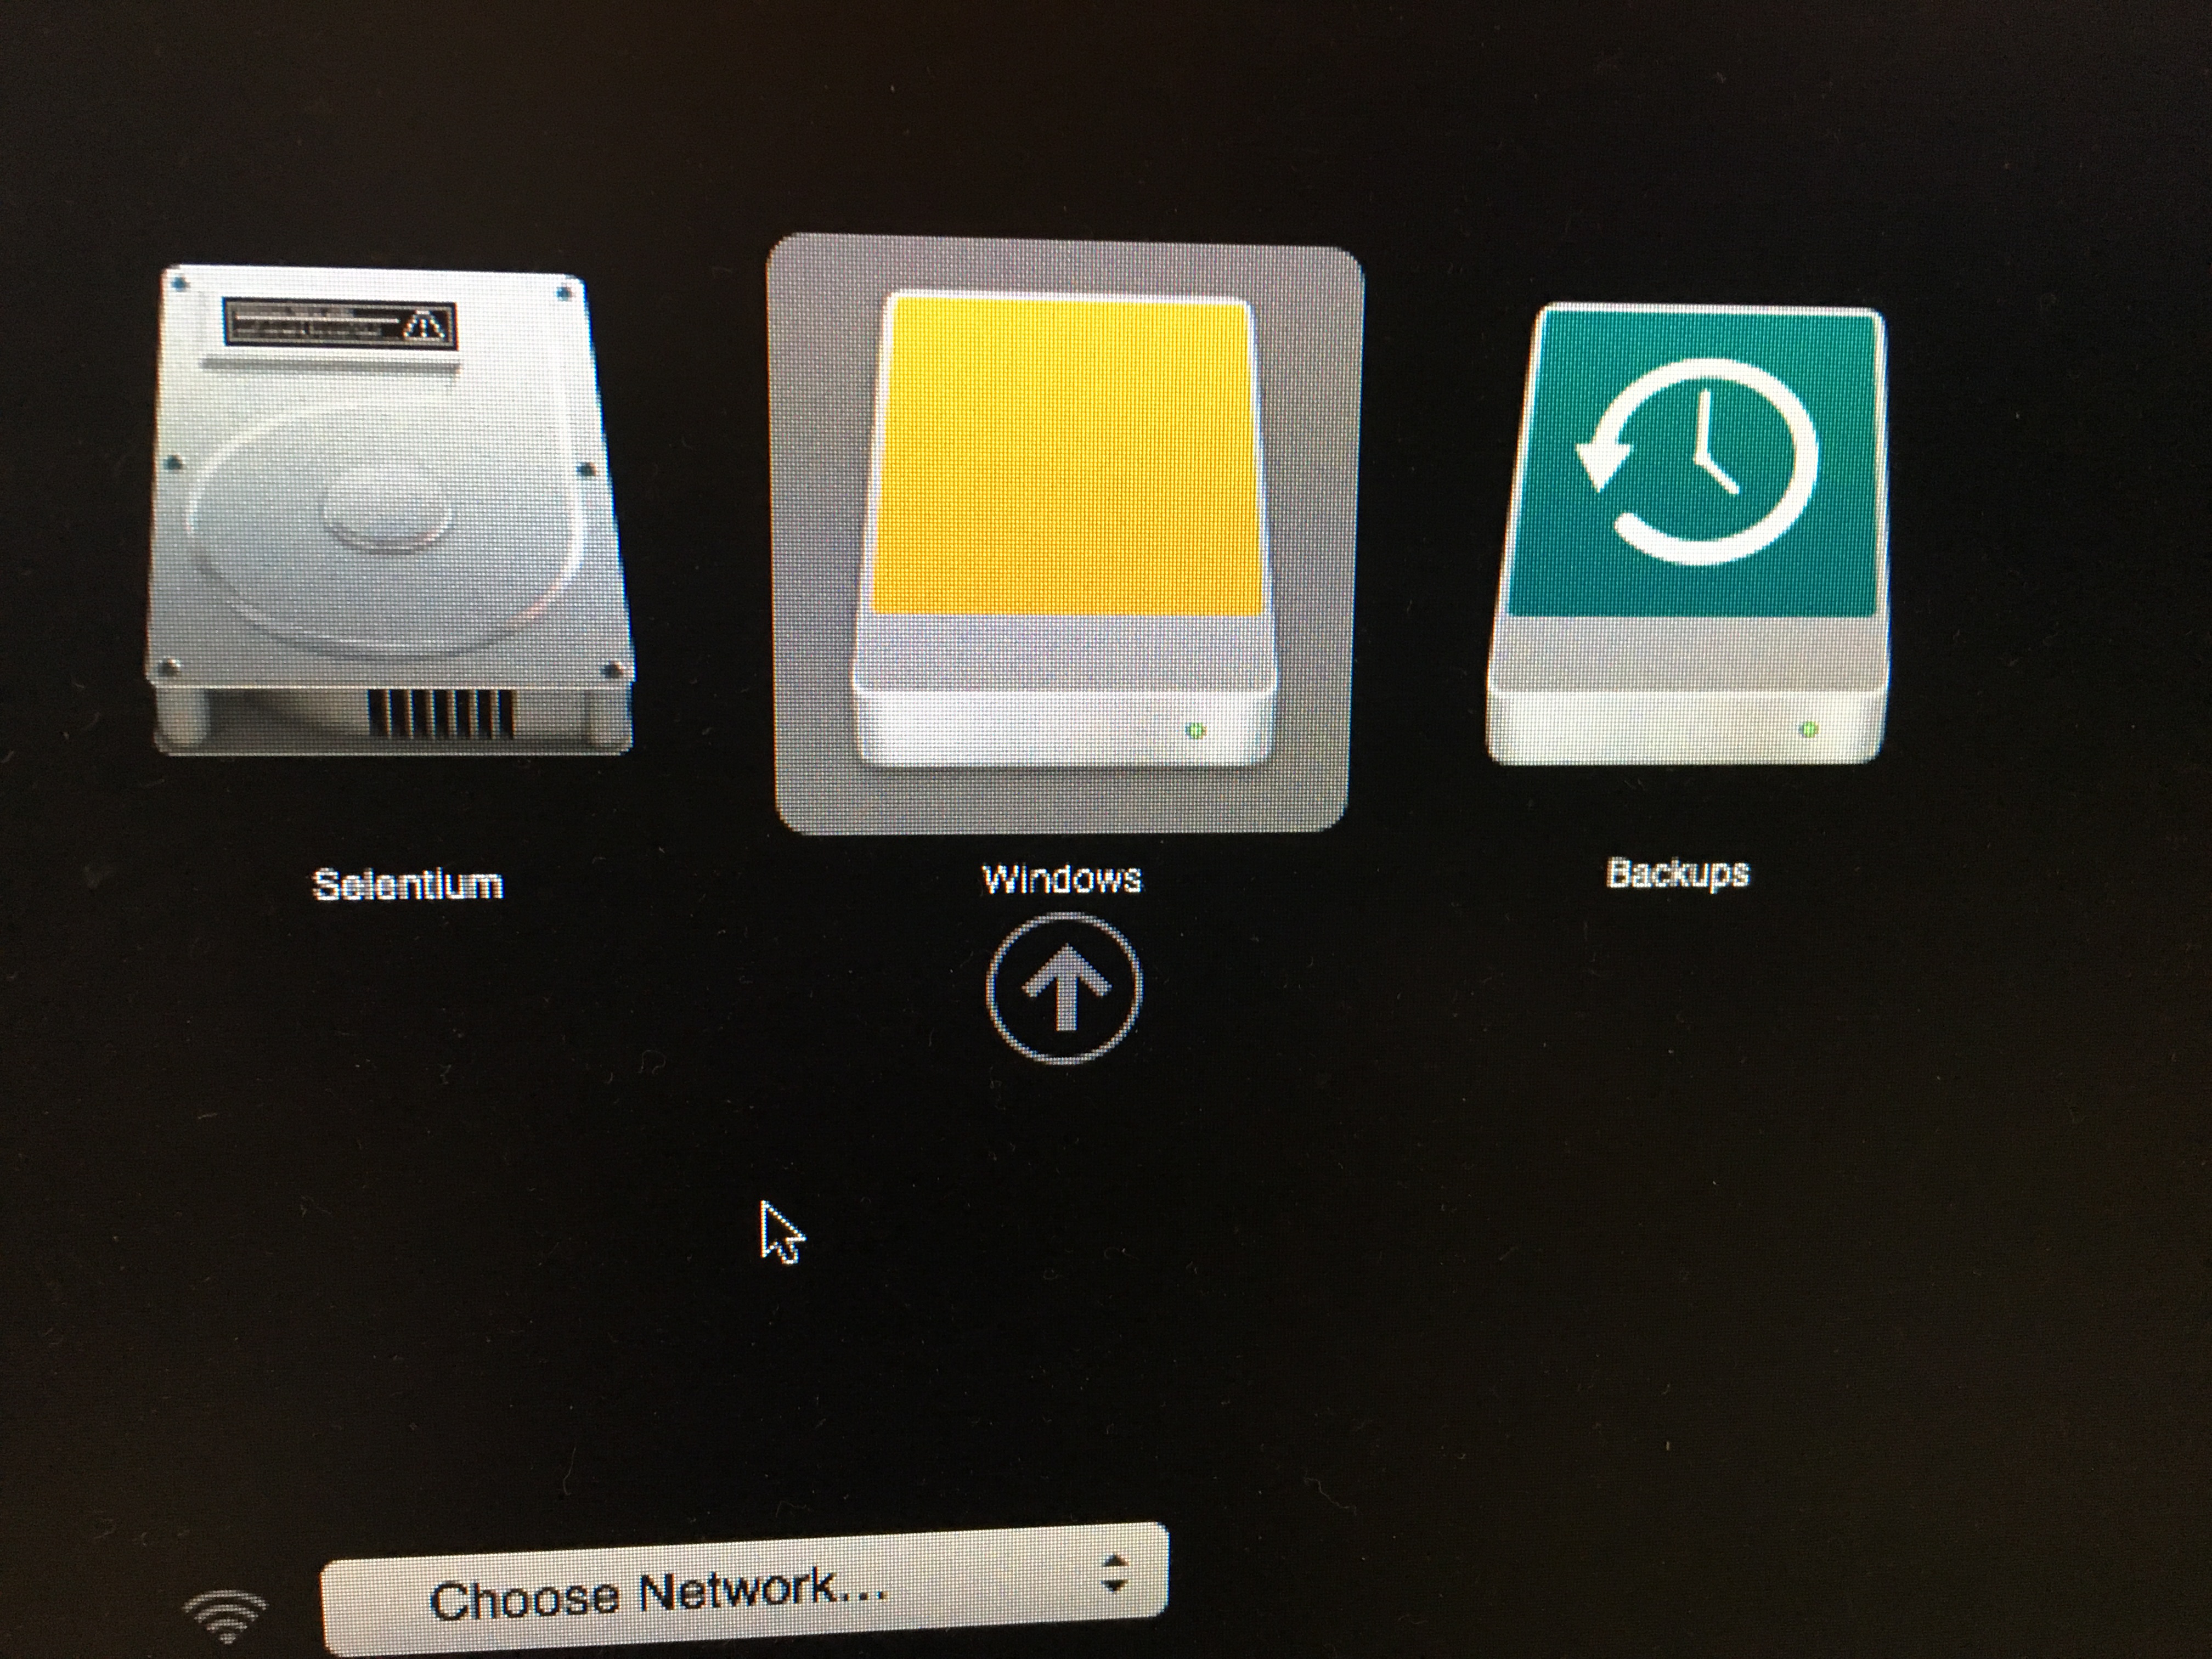
Yes it says Windows but trust me, it’s PureOS. The Mac just doesn’t know it.
5. Install
Now you should be able to boot the live CD and install it to your hard drives. The device numbers will be different from what we saw in macOS, so please be sure to identify your disks properly before partitioning and formatting!
In my case I haven’t had luck with encrypting my PureOS install with LUKS, but I want to try to figure that out at some point.
6. Booting
In my case, I ignored the usual advice of installing ReFit or ReFind as a boot manager - I find my Mac’s EFI is good enough, although I want to take some inspiration from
https://heeris.id.au/2014/ubuntu-plus-mac-pure-efi-boot/
Because right now when I reboot and press Option, I see three choices: Windows, Selentium (my macOS disk) and Backups (boot from my Time Machine backup). Even though it says Windows, it’s actually my PureOS install! So I need to resolve that to have the proper name and icon.
It also boots to the macOS by default, with no way to change even from System Preferences, but I think it can be resolved by instructions at those two links. I haven’t tried them yet.
Prior expierence with ReFind messed up my ability to upgrade macOS, so I hesitate to go that route again.