So, I got a new Librem 15 - I was very unpleasantly surprised during install that it didn.t let me select an advanced mode and specify the partitioning scheme for the harddisk where PureOS w as installed.
Now I have the full SSD used up by the encrypted swap and root - which I didn.t want.
what I want to achieve - partition the SSD into many 10 GB partitions so I can install many GNU variants to experiment with them on the Librem.
How easiest to achieve this now?
Download an OEM reinstall image for the Librem and use some switch when booting into it that will enable to run an advanced install and partition the disk manually? If so - where is a current image - i.ve seen it mentioned in a post, but the puri.sm location it was referring to is dead now…
Or repartition the currently installed disk? Is that even possible from Gnome Disk when the system is running? How exactly?
I.m sure people must be multiple booting systems and it.s not just me who wants to do this…
I just tried booting a VM with the PureOS .iso, and I was able to manually partition the virtual hard drive. Unless there’s some significant difference in what’s pre-loaded on Librems and what is available for download, I think you should have been able to manually partition the drive. It is admittedly less intuitive and obvious than in other installers I’ve used, though.
I think you would also be able to use any other distro’s (Ubuntu, Fedora, etc) live USB to repartition as well, though I don’t have experience with repartitioning an encrypted disk, so I don’t know whether that adds any complications.
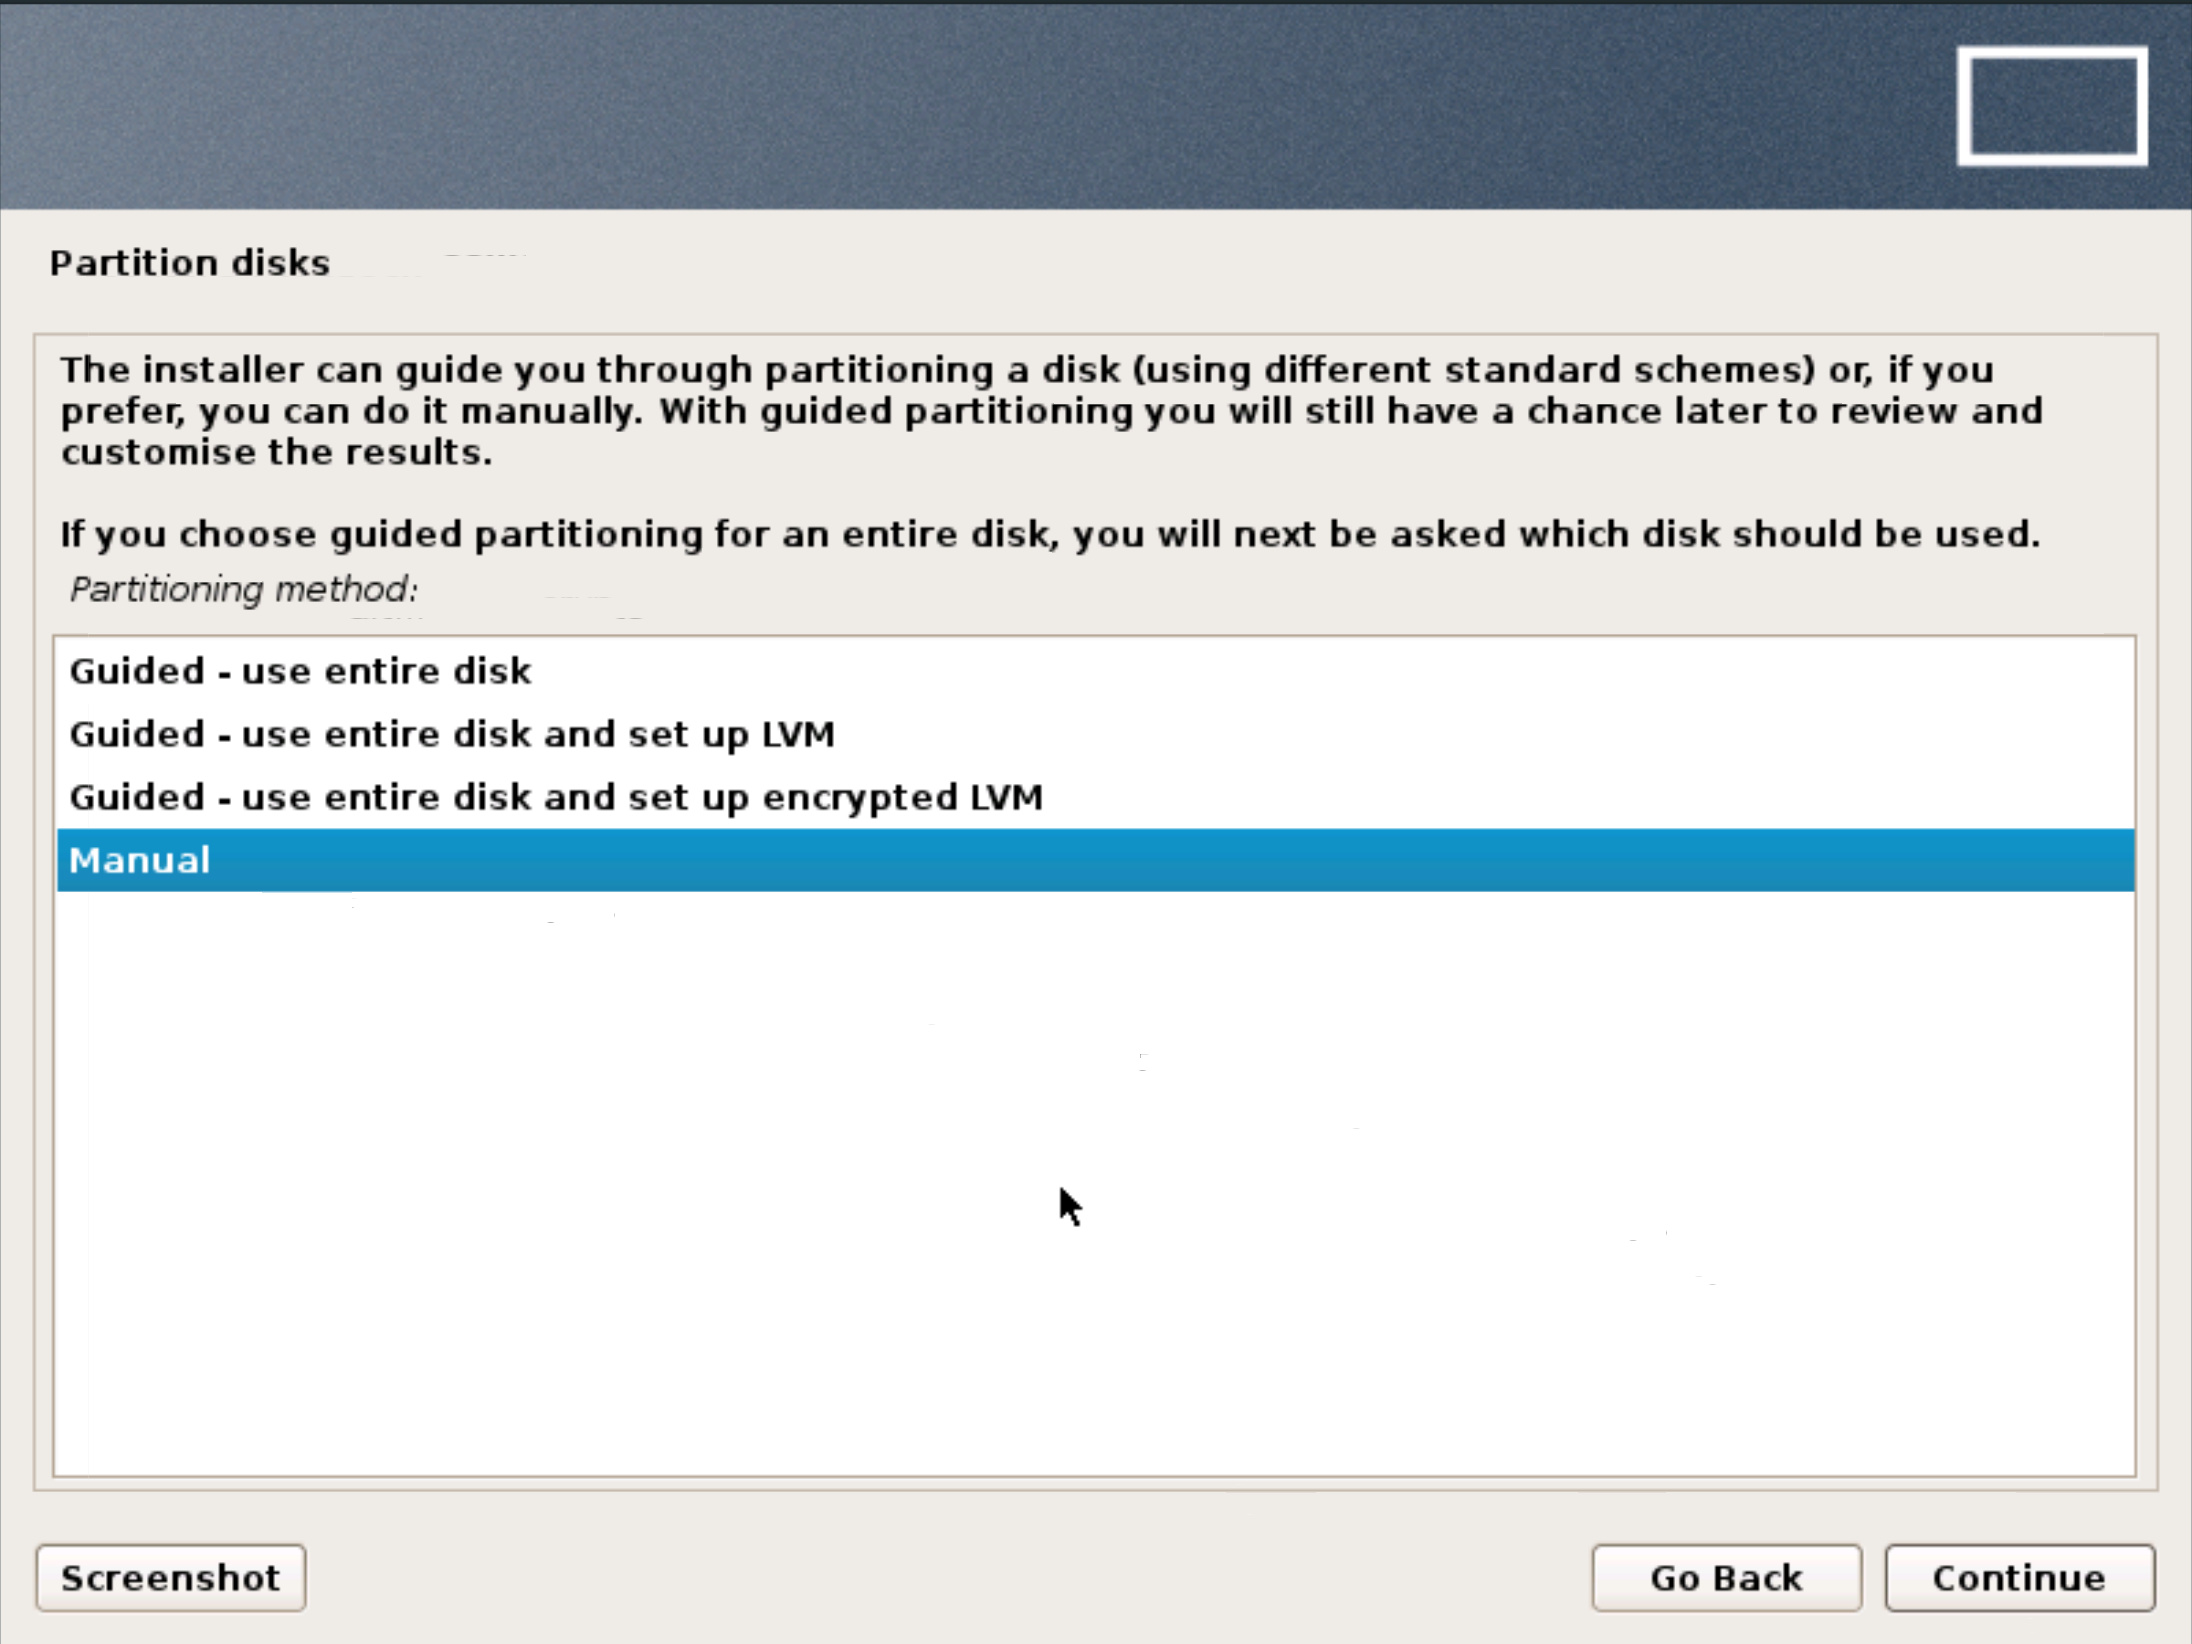
This is the screen that pops up during standard Debian install — it didn’t, which suggests to me there might be some difference. Maybe there is customization for the Librem in the install image and that’s why I should use a custom Librem installer to reinstall? Don’t want to mess with non-functioning touchpad and stuff later…
I don’t think it’s that easy, as you have to resize the encrypted partition before adding new partitions — you can’t just delete it. That’s why I’m trying to find a Librem specific installer and reinstall as that seems easier.
Honestly I don’t understand why if you have a recovery partition —from which you install the system originally — you can’t boot it again from Coreboot and rerun the install, which prior discussion here seems to indicate can’t be done. Why not? Anyone from puri.sm care to explain?
[quote=“ShiroiKuma, post:3, topic:2915”]
I don’t think it’s that easy, as you have to resize the encrypted partition before adding new partitions — you can’t just delete it. That’s why I’m trying to find a Librem specific installer and reinstall as that seems easier.
Honestly I don’t understand why if you have a recovery partition —from which you install the system originally — you can’t boot it again from Coreboot and rerun the install, which prior discussion here seems to indicate can’t be done. Why not? Anyone from puri.sm care to explain?
{quote}
I’m very new to GNU/inux. I have wondered the same thing. I just had a user password problem that nothing fixed so I just downloaded pure OS and installed it on a flash drive then reinstalled everything and updated it. There is a manual way to set up your own partitions during the install. I only had files on the 120gb disc and nothing happened to them.
I screwed up though and clicked the wrong thing so my disc didn’t get encrypted on the install. Trying to figure out how to fix that now or 'll have to go back and reinstall again which really didn’t take that long.