This is the second time that I have to open my Librem 13 v3 to repair it.
First time, my some keys of my keyboard stopped working:
it turned out to be the sticky tape that held the keyboard came loose . .
Now, I lost the sound.
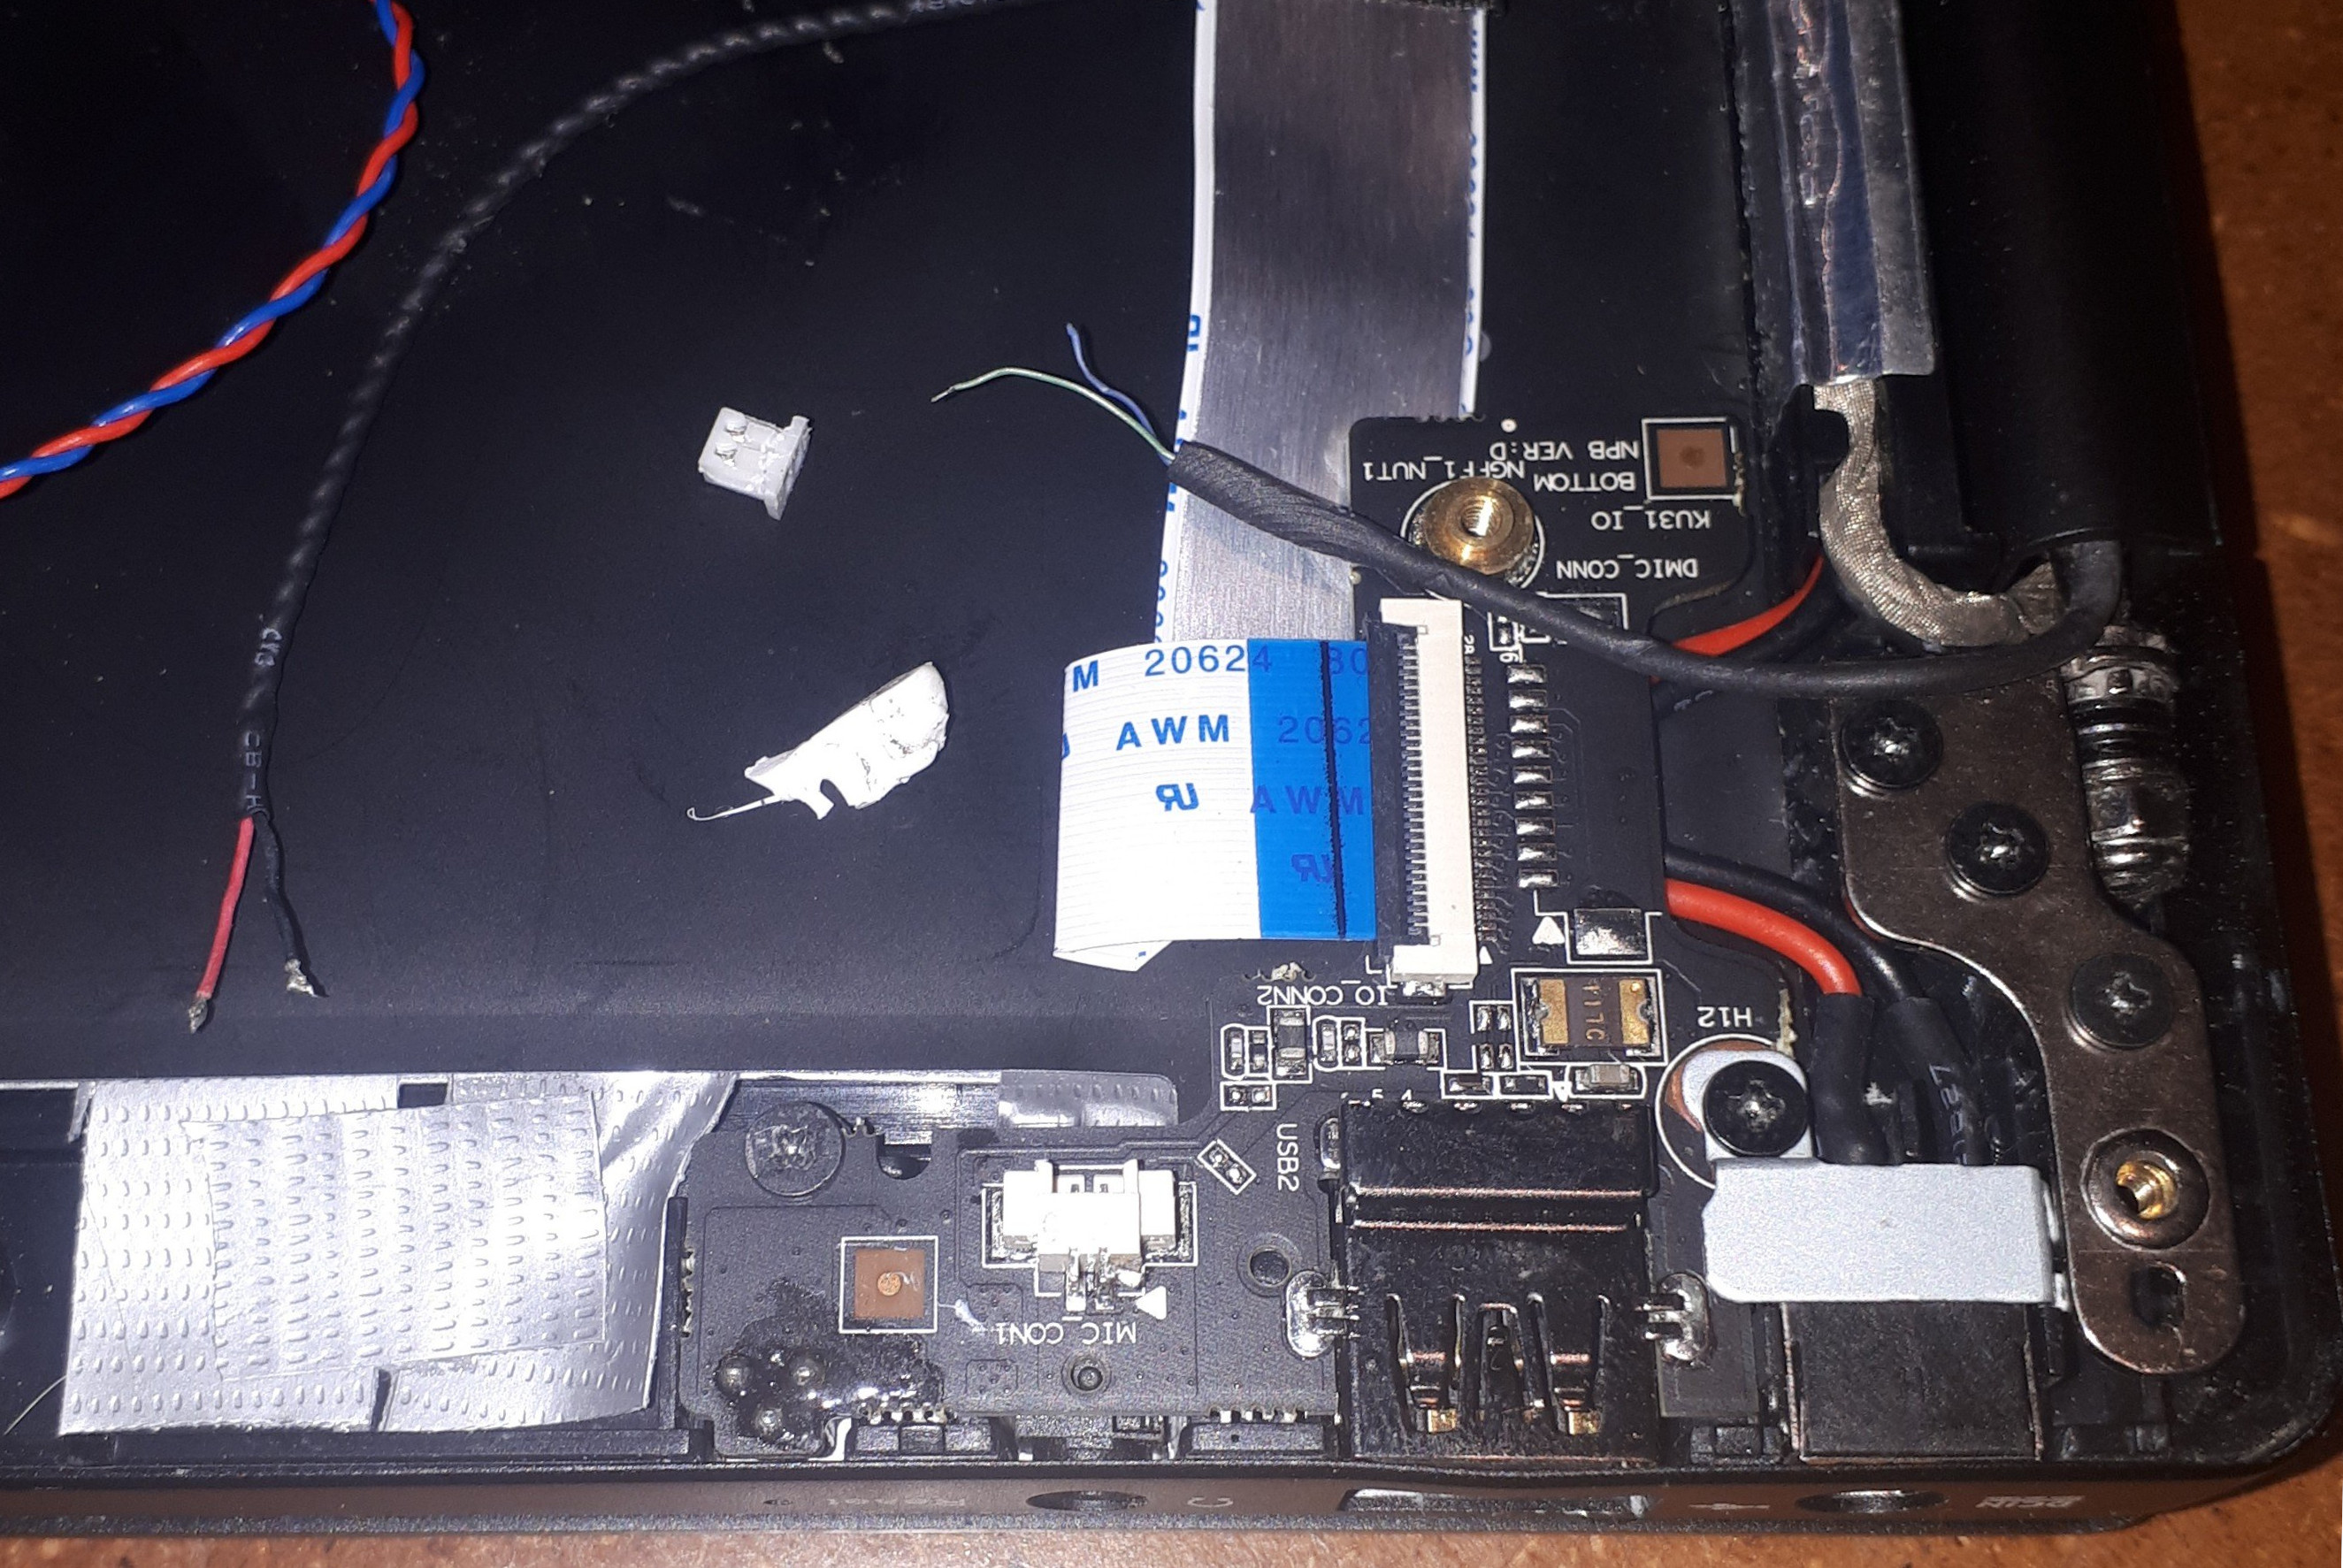
when I opened the laptop - I found a bit of ‘glue’ and cables disconnected
Could I please have some guidance to repair this?
Please keep in mind that I do not know how to ‘solder’ cables to MotherBoards, and I have zero understanding of electronics.
Is there a Purism repair shop in Europe to repair this?
Or, what?
Finally, I would like to say that ‘I am not impressed with Purism hardware, at all’
See image with the dandling cable and the bit of ‘glue’ (white stuff), attached
Hi,
I am sorry for this… this was the first version of the microphone kill switch implementation before we moved the kill switches to the small PCB on the side.
This can be repaired pretty easily just by soldering the wires together. We can do this for you in Europe (Germany) but with Brexit shipping has become a pain (takes a long time right now and taxes and customs has become aweful). So if you have the chance I woud recommend visiting some local repair shop for it, if you you think you can not do this on your own. It will be quicker and cost far less.
What you basically have to do is solder one end of the red/black wire to one pin of the white connector on the PCB, one wire of the other cable to the other pin and finally connect the remaining two leads together. I just don’t know frmo the top of my head which pin of the white connector needs to be connected to the red wire. This goes to the microphone which is a electred capsule which again is polarity sensitive. I can tell you on Monday when I’m back in the office.
If rather want to ship it to us in Europe, please get in touch with support@puri.sm
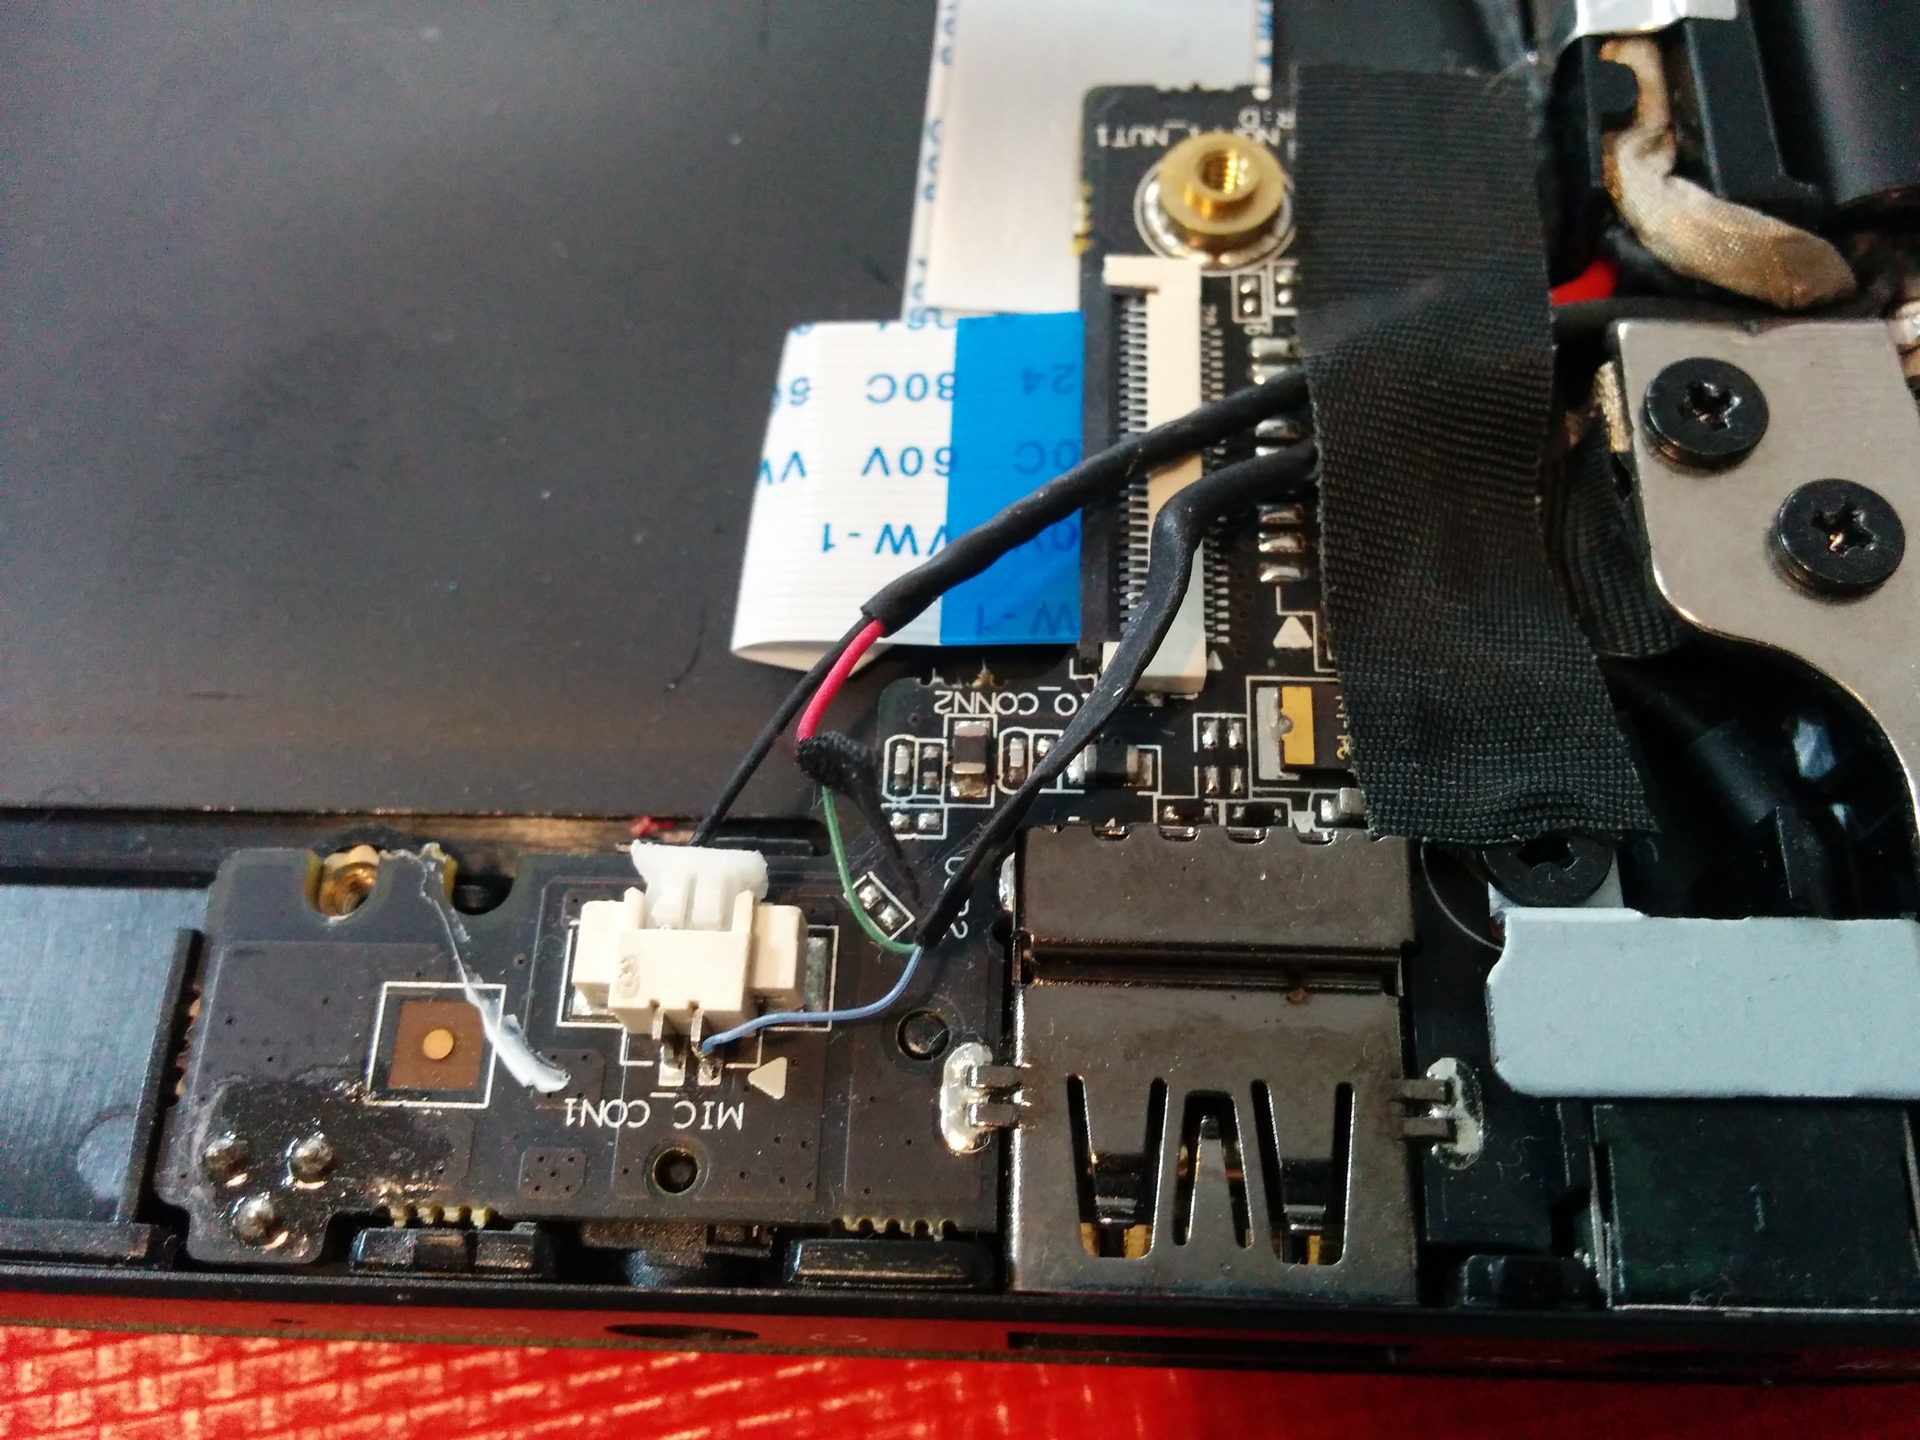
The microphone signal comes from the main board to the small PCB through the flat ribbon cable (the white) and is then routed to the white plug. The red and black wires go to the microphone in the LCD panel, the green and blue are the wires to the kill switch.
In your case, since the white plug obviously also got ripped off, you can solder wires directly to the metal pins of the connector on the PCB (in the picture the pins facing down). So the black goes to the left pin of the connector, the red gets connected to one of the two kill switch wires (does not matter which) and the other kill switch wire gets connected to the right pin of the connector. This put some tape again around the connection of the two wires to protect them from touching other metal surfaces.
I have to do this manually and I have no experience with soldering these components.
for the record, the plug was not ‘ripped-off’ - I removed it when i found the cables loose inside the case.
As you know, there are loads of ‘little cables’ connected to the MotherBoard. and, if you are not careful when opening the case … goodbye laptop!!
I will try following your guidance (thanks) - if you know of a nice soldering equipment for beginners, it would help.
If you get hold of it, the TS100 is a great little soldering iron - with open source firmware! You should be able to get one from Amazon or eBay for around $70 to $80. It works with the laptop’s power adapter!
Some fine solder (less than 1mm diameter) is also a good idea - you may need it to tin the wires and contacts and you need the flux included in the core of it so that you can properly solder stuff together.
In case you are not aware, the Librem13 v2 has some fundamental problems, such as the keyboard is held by stick tape, there are tons of little fiddly cables all over the MB, …
I might leave it as a diy project,: as resurrection.
I can only honestly advise you to leave it to the professionals. That means either a local repair shop, with no specific experience of the Librem laptop hardware, or to Germany in order to have Purism do it.
While either option may mean that you will be without the laptop for some time, you give the impression that you are not using the laptop in its current state, so being without the laptop won’t be a problem.